Este artigo também foi publicado em português e pode ser acessado aqui.
Continuing the saga of the DIY sound system, I need power amplifiers to drive the 6 speakers of the 5.1 system, that is, for the 1) front left; 2) front right; 3) rear left; 4) rear right; 5) center and 6) subwoofer speakers.
As I presented in the first post, the project of the front speakers started together with the PL1050 amplifiers: these amplifiers are truly cost-effective, in addition to having been a great introduction to electronics. However, I only had built 4 power amplifiers (i.e. 4 channels) and, to make two more channels, it would not be viable in terms of space in the cabinet. Thus, I sought a new power amplification solution for the system that equally presented a good cost, great quality, and occupies a small space.
This power amplification solution would be, precisely, the Gainclone!
The Gainclone is a “low-cost” power amplifier that emerged a few years ago (ok, a few decades ago) on the internet, being built by a lof of “DIYers” around the world. This power amplifier is considered high quality (High-End) and it is based on a central component that is a chip-amp, that is, an amplifier that is based on a chip (and not built using discrete components).
A summary of the Gainclone is presented in the Wikipedia article ![]()
Regarding the costs for assembling this amplifier, they are more concentrated on the chip used (the LM3886) and a few components (heat sinks, transformers, capacitors, etc.). In addition, there is the cost of the cabinet and the finish for the amplifier’s cabinet.
In order to reduce costs, a friend and I organized a kind of “buying club” for components to reduce costs while increasing the quantities of components being acquired. Following, there is the post on HTFORUM that explains the operation of the buying club and also presents the necessary components for assembling the Gainclone (remember, the post and prices are from 2013, in BRL, i.e. Brazilian Real!):
Folks, I constantly update this first post with what’s happening on the forum, the summarized information, prices, and the operation of the club are always explained here.
Dear colleagues of the htforum,
The reason for this post is quite simple: I am an electrical engineering student and a lover of good music. A few days ago a friend asked me about a good power amp project. I was already familiar with the fame of the Gainclone and the beautiful work that Mr. Miguel Nabuco had done with his assembly kit. Unfortunately, we no longer have the kit available…
However, it’s always good to revive successful projects, and I set out to try to build the Gainclone with friends. Asking for permission from Miguel Nabuco, who treated me very well and showed interest in helping us, we could then build a Gainclone ourselves. But what about the components?
Well, let’s go direct to the point: I thought about raising the issue and seeing if anyone else would be interested in assembling the Gainclone and, thus, buying components together, like a buying club for ICs, toroidal transformer, cabinet, connectors, etc… always aiming to get good prices and, of course, with no profit involved.
For those who don’t know: https://nabucolab.com/2023/11/08/gainclone-lm3886-2008/ (the page that Nabuco still left in the air, to present the Gainclone). We also have the schematics and the PCB layout of it. Still about the Gainclone, read this article, entitled “100-Watt single-IC amplifier”, published in the 7th edition of the year 1998 of Elektor UK magazine.
Nabuco himself suggested and, cordially, offered to take care of the PCBs. If we could get enough people, we could have the PCB at a very affordable price and with professional quality! In advance, I leave here my thanks to Nabuco for offering us help in this project, he is a magnificent person. Even if we can’t lower the price of the board much, we can each make our own board and, of course, help each other in the other stages of assembly.
We still don’t have prices available, it would be nice to have a base of people to estimate the costs, but I believe that, to assemble a quality stereo unit, we should spend around 300 reais. Something that pleases our ears, without straying too much from our budget.
So, folks, interested?
UPDATED PRICES:
Toroidal Transformer: the transformer is an expensive component of the power amp, perhaps the most expensive in the project, especially if manufactured in small quantities. That is, the more we acquire, the better. The current budget is for a piece with input at 0-127-220V (that is, to be used both at 127 or 220VAC) and output with 5 wires (26-22-0-22-26) x 5A (per winding, that is, power of 220VA or 260VA). The voltage of +/- 26V was included in order to obtain higher power in 8Ohms, we use +/-26V OR +/-22V in the transformer output. A single piece is needed to power the two Gainclone channels. The piece will be ordered at Hortrafo-Hortec in Hortolândia-SP. The exact dimensions are 96 x 65mm, weighing 1.9Kg: TRANSFORMER: 75 reais
Cabinet: The buying club’s cabinet would be the NDT/2 from Naoko. The model is capable of housing a stereo unit of the Gainclone (two channels) and is relatively small. More information about the cabinet: https://www.naokoloja.com.br/MLB-2768590087-gabinete-caixa-metalica-p-montagem-340x80x240-ndt2-_JM# and, for those who wish to give a good finish to the piece, I suggest using a black acrylic sheet (something like this: https://produto.mercadolivre.com.br/MLB-2745700134-chapa-placa-ps-colorido-tipo-acrilico-30x30-cm-2mm-_JM) on the front of the cabinet, with a blue led. It would be a very simple and elegant look. The acrylic and led are not included, they were just a finishing suggestion. CABINET: 37 reais
Heat Sinks: as suggested by Miguel Nabuco, I quoted at Fenite Dissipadores (model used: FNT-012-AL, cut with the length of 7cm, that is, the base where the IC is screwed would be 154x70 mm). Each piece, for a single channel, would cost R$19,00 (above 10 pieces). Two pieces are needed for the Gainclone, one for each IC. HEAT SINKS: 38 reais
ICs: The LM3886TF (version used because it has an isolated case and does not need an insulator in the heat sink) can be purchased at Farnell for R$19,00 + shipping. Two ICs are needed for the Gainclone. ICs: 40 reais;
RCA connectors and terminals: The RCA connectors will be purchased together from João Yazbek for 17 reais per pair, these are used by João in the products of his company. As for the output terminals (4 pieces/two pairs are needed), as suggested by Gabriel (upking), we can acquire them from Nakamichi http://www.nakamichiplug.com/product-0520L.html. It is the option with the best cost-benefit ratio and, as they deliver with free shipping, it is more interesting to keep them out of the club, each one buying their own set of terminals. RCA CONNECTORS: 17 reais.
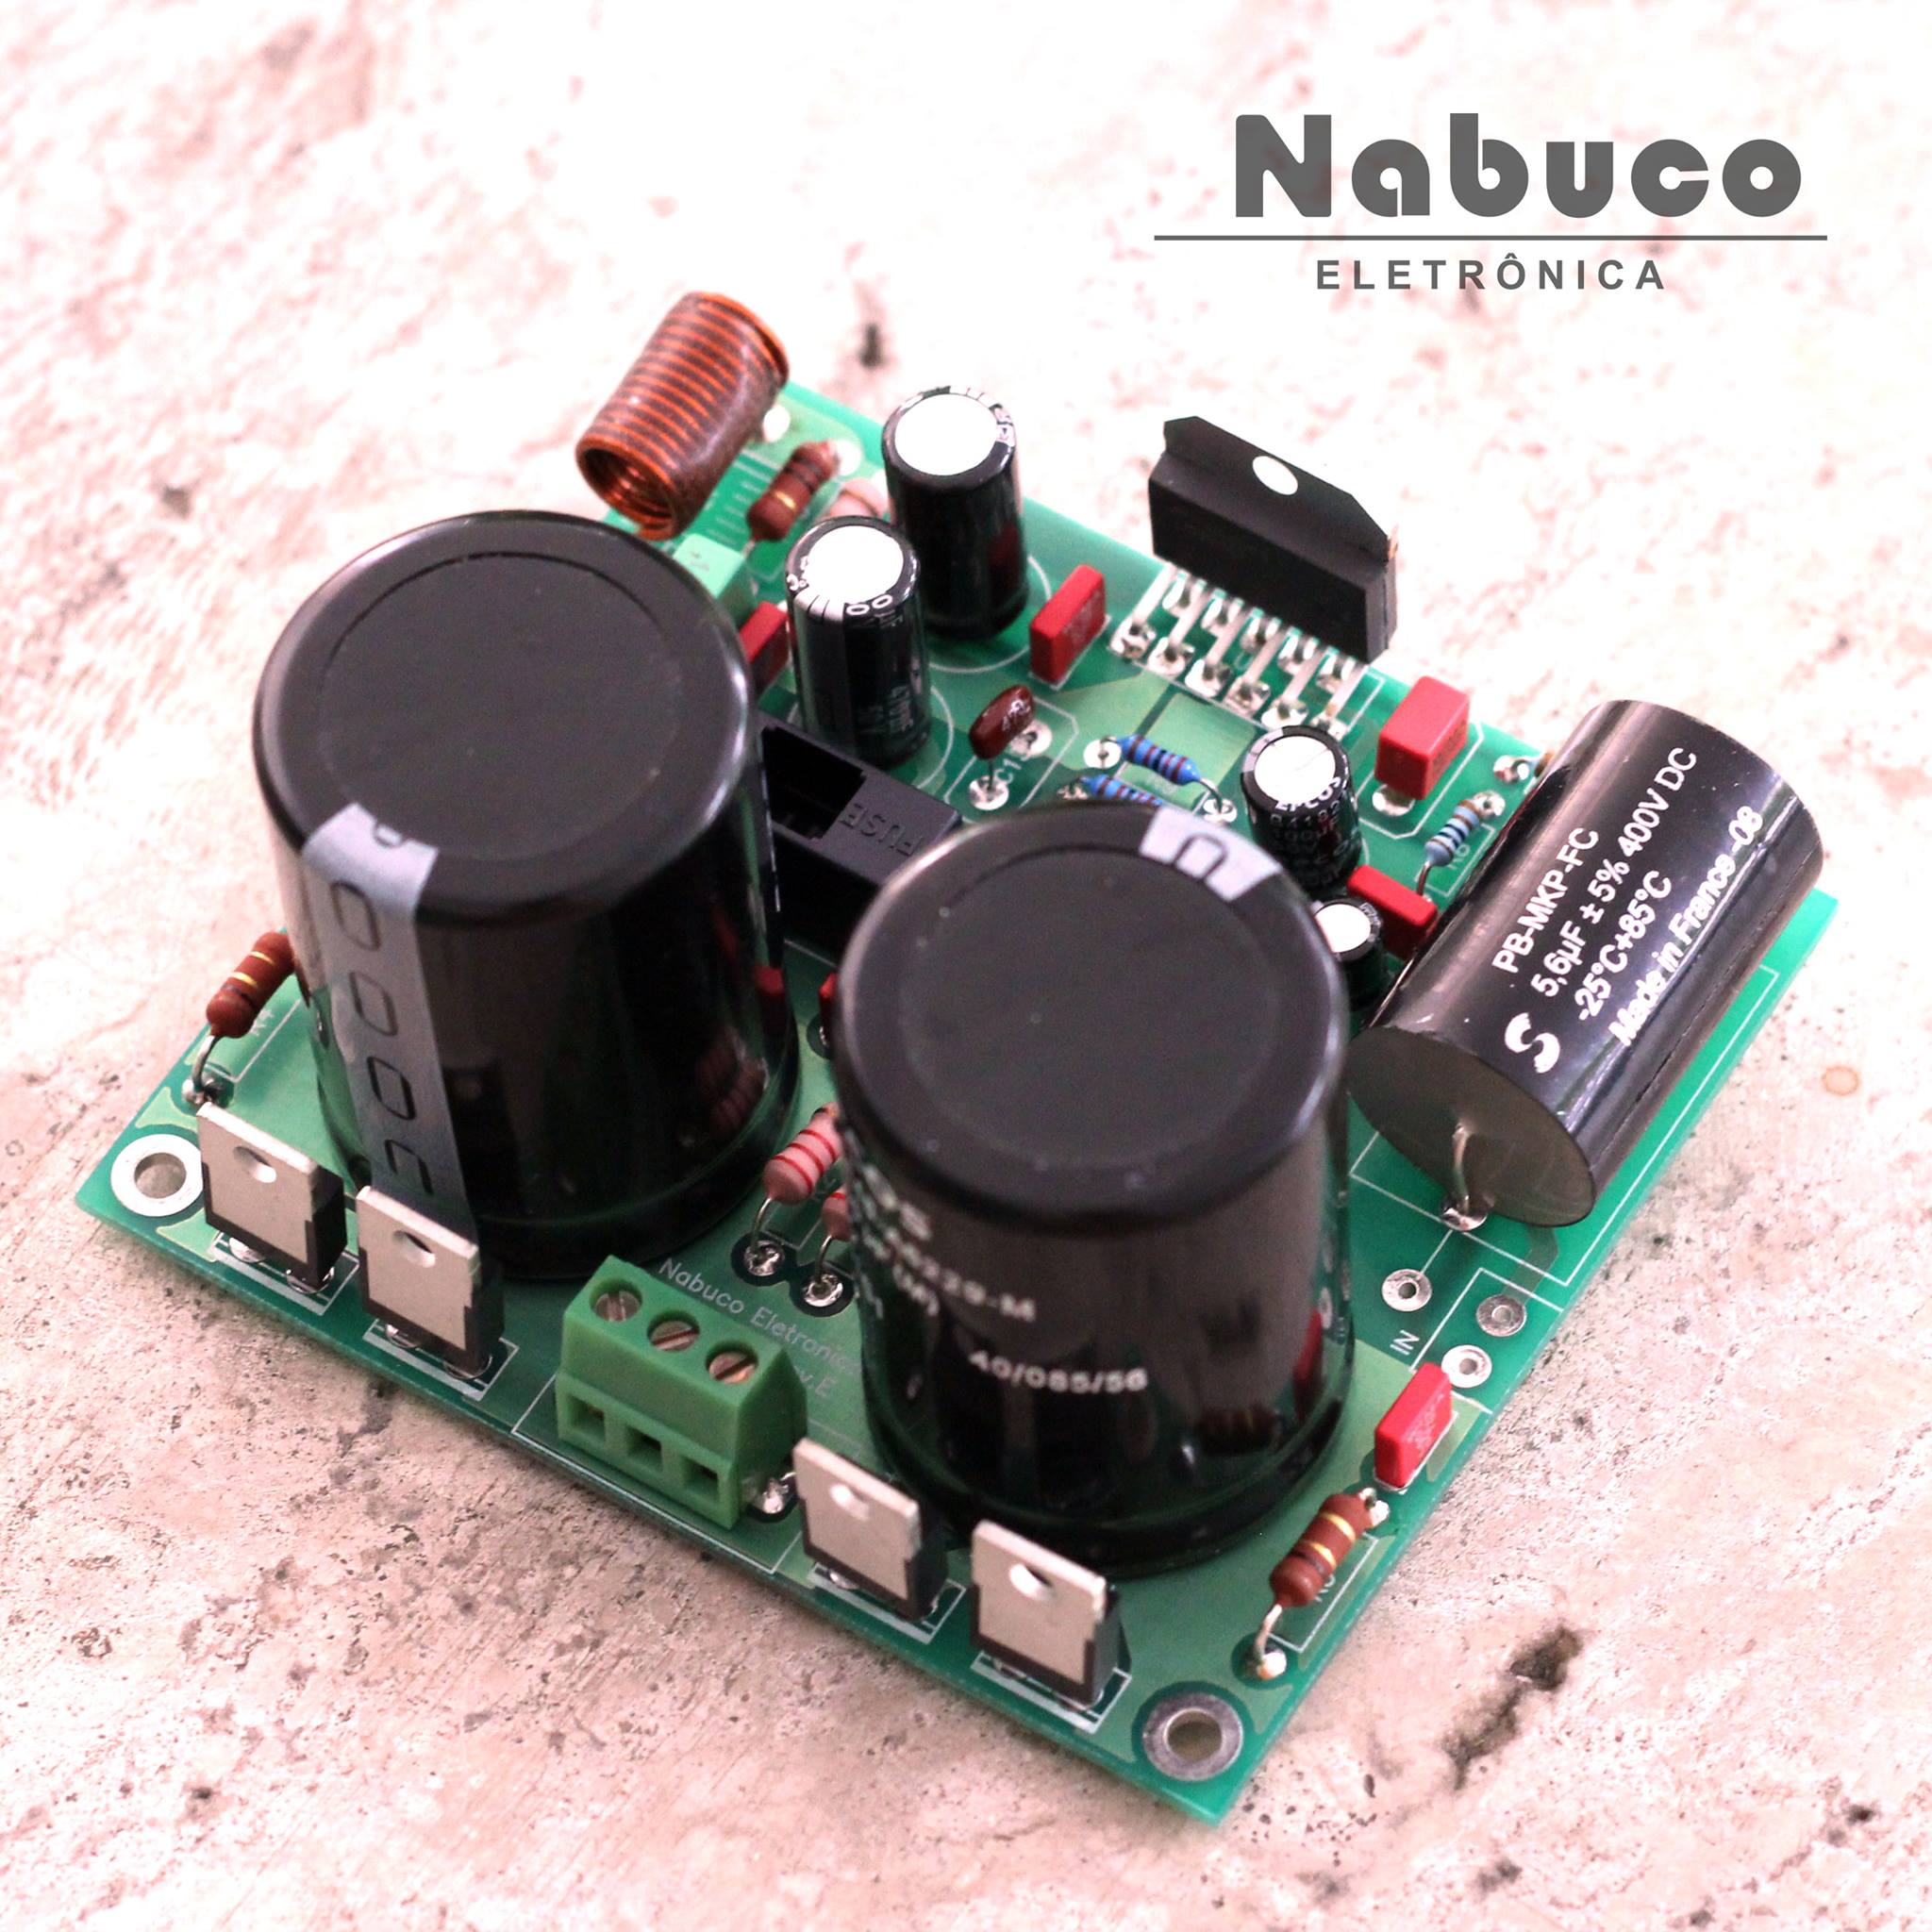
Printed circuit boards: Miguel Nabuco, kindly took responsibility for quoting the printed circuit board. It was changed to facilitate the acquisition of accessible components, among other modifications in order to have more quality, too. This budget is for fiberglass boards, double-sided, with metallized holes and tinned finish and CNC drilling, each board costs R$14,00 and two boards are needed, one board for each channel. Each board is 10x9 cm, as shown here (kindly provided by Miguel Nabuco himself): PCBs: 28 reais.
Electrolytic Capacitors: the new version of Nabuco’s board contains, each one, 2 capacitors that can be up to 10,000uF. Therefore, I budgeted the EPCOS model of 10.00uF x 50V, we would need four units for the Gainclone. The unit costs R$5.22 at Radio Emegê (wholesaler in the Sta. Efigênia region, in São Paulo). I found their prices quite attractive, but the minimum sales quantity is 150 reais. CAPACITORS: 20.88 reais.
“Total”: 254 reais. (in the worst case, we are studying methods to lower this value). Remembering that this value corresponds to approximately 90% of the ready and assembled unit! Still missing, not included in the club, are the passive components (resistors and capacitors of the Gainclone), knobs, cables, screws, solder, etc… I am also not considering the shipping costs for each buyer. And also the shipping of the products, which I believe will not be so high. Remembering that you can, according to the budget, acquire one or another item from the list above.
First, general questions:
1 - PARTICIPATION: Firstly, the club would close on March 31, but as there were still interested parties, I continued adding them to the list. So, the list greatly exceeded expectations. To facilitate the issue of shipping to my residence, I decided to leave the club open until, Friday, April 5, until 23:59 with one condition: the maximum limit of 40 participants in the club (we are at 34), this is due to the work involved. That is, whoever sends me an email until this date can still be in. Another important point is about the response to emails. Please, those who have already sent an email but have not yet responded with the data, do it as soon as possible. Participation in the club is not guaranteed until the names are on the participants’ spreadsheet.
2 - DEADLINES: After the deadline above, I will have the exact quantity of components in hand and thus I will know the price of the shipping of the products to my house. Only payment guarantees the order of the components and participation in the club. I would make all orders on April 15 and then wait for all components to arrive at me. At this moment, with all the components in hand, I would wait another 3 business days for the deposit of the calculated shipping to each participant’s house. Finally, I would make the selection, packaging and shipping of the components. Does everyone agree?
3 - COMPONENTS AND CHANGES: If you wish to participate or want any changes in the components (to the participants), please communicate with me via email (my email is in the topic, just search correctly), to keep us more organized. The changes requested by the topic will be made, but new changes, via email. Packaging will be divided proportionally among buyers, for each type of components. Correct? I will also specify this in the spreadsheet.
Cheers!
This Buying Club took place in April 2013. Thus, the estimated cost at the time for assembling a stereo unit (2 channels) was approximately R$254.00. Despite the work involved in organizing it, buying the components, separating them, and sending them to the group participants, it was a very rewarding task: I met several people interested in DIY audio. Of course, I was able to greatly reduce the costs involved in assembling my own power amplifiers and, in the end, I even received some gifts and giveaways from the buying club participants (a kind of recognition of my work in organizing it).
Finally, after organizing the Buying Club, I had my units separated so that I could assemble 3 stereo amplifiers (that is, 6 channels!) that I would use - and still use - in my 5.1 DIY home-theater.
The following images show the assembly of the amplifiers. Below is the first assembly test of the Gainclone component kit:
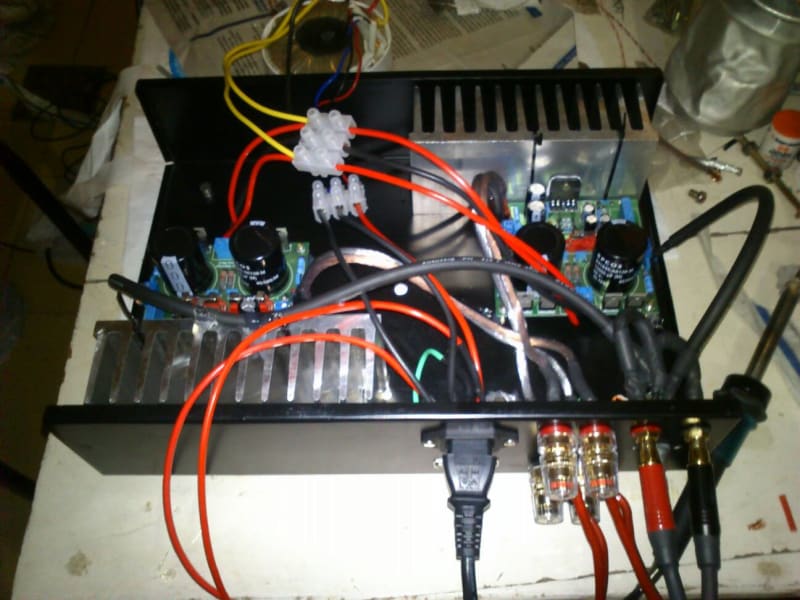 You can see the two amplifiers on the bottom left and top right sides. The printed circuit boards have a few discrete components necessary for the chipamp and also the power supply for the circuit (one for each amplifier). The LM3886 chipamp - “the heart of the Gainclone” is attached to the heat sinks. However, the toroidal transformer that will power the two circuits is still missing.
The following image shows the completed assembly of the amplifier, now with the toroidal transformer installed:

The back of the amplifier is shown in the following image:
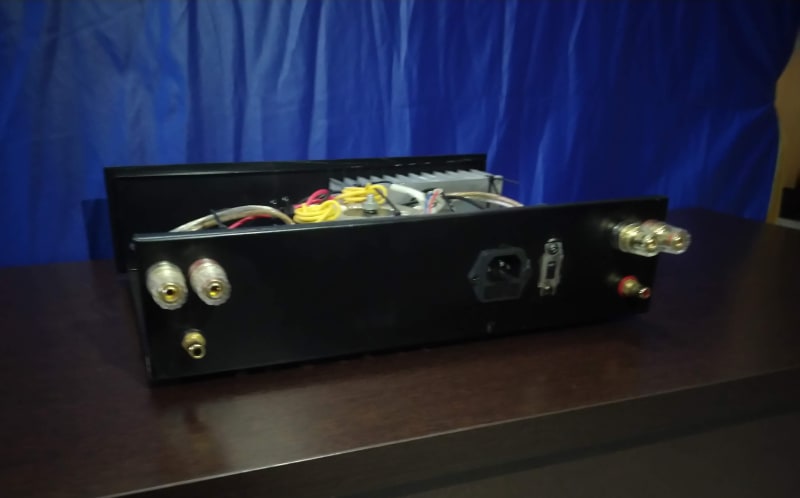 On top, on the left and right sides, we have a pair of terminals for connecting the speakers. Just below, we have the RCA connectors for the signal input corresponding to that amplifier. For the power input, an IEC 320 C14 connector was used (the same as used in computers) already with a fuse holder. Finally, there is still a 127-220V selector switch.
The Gainclone can be considered a power amplifier, that is, it handles already pre-amplified audio signals. The installation of a potentiometer - a passive component that allows volume control - would raise some questions:
To facilitate the assembly of the amplifiers, reduce costs, and knowing a priori that I would use some type of pre-amplifier, I chose not to install any potentiometer.
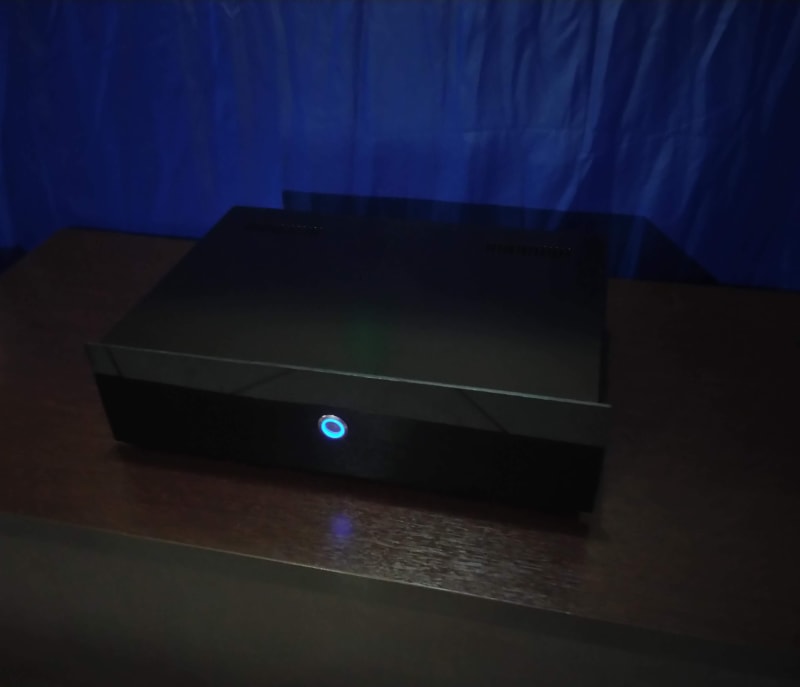
Since no potentiometer was used, the amplifier finish would only need to include an on-off button. For this, I used the button with an illuminated LED as shown in the following image:

Still about it, remember the black polystyrene sheet I used on the rear and central speakers? I also used it for decoration on the front of the amplifier cabinet, bringing a black piano effect that was quite interesting:

Now with the amplifier powered on (the LED on the button gives a very interesting effect!):
Three Gainclone amplifiers were assembled, totaling 6 channels! The result was quite satisfactory (yes, I use them to this day!): they are robust, reliable amplifiers that have a great response. I recommend them to anyone looking for a high-fidelity power amplifier DIY project.
With this post, I presented (almost) all the components used in my DIY home-theater. The next - and last - post will talk about pre-amplification, audio source selection, and possibilities for connecting and playing different audio sources in the home-theater.
Again, I am available for any questions! Shall we talk about it?
Cheers!